Localize Your Flutter App End to End
A complete workflow from Flutter ARB setup through AI translation, validation, and running flutter gen-l10n.
Last updated
This tutorial walks through a real localization workflow for a Flutter app: setting up ARB files, opening the project in StringLane, adding new locales, translating with AI, fixing validation errors, and generating the Dart code that Flutter needs.
Prerequisites#
Your Flutter app should already have flutter_localizations set up. If not, add it first:
# pubspec.yaml
dependencies:
  flutter_localizations:
    sdk: flutter
  intl: any
And configure l10n.yaml:
# l10n.yaml
arb-dir: lib/l10n
template-arb-file: app_en.arb
output-localization-file: app_localizations.dart
Run flutter gen-l10n once to generate the initial Dart output. You should now have a lib/l10n/ directory containing at least app_en.arb.
Step 1: Open the project in StringLane#
Drag your Flutter project root (or the lib/l10n/ folder) onto StringLane, or use File → Open Folder.
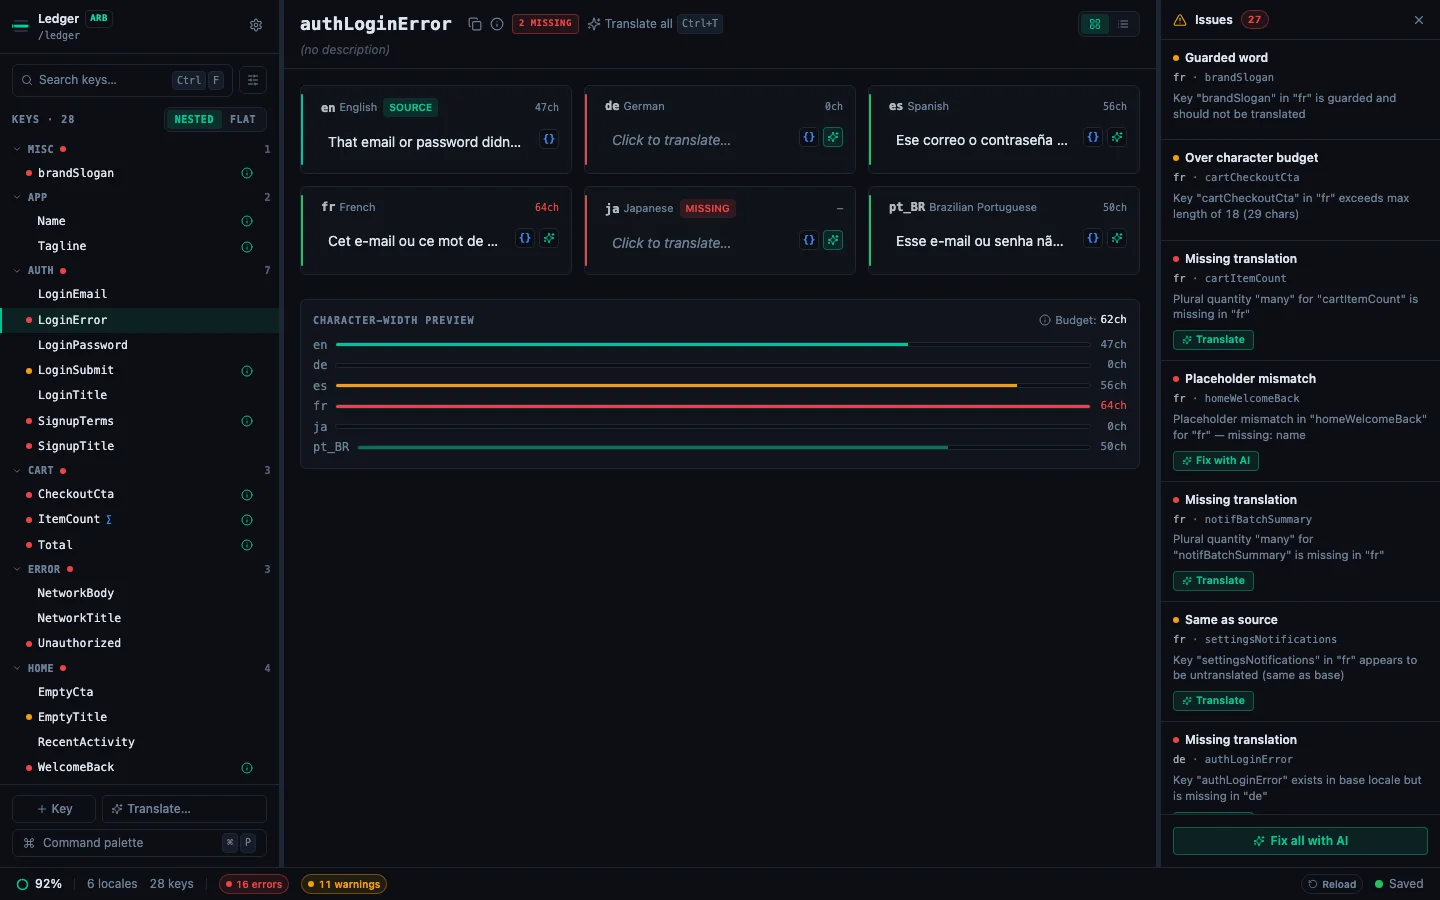
StringLane finds all app_*.arb files and loads them as locale rows. The sidebar lists every key (grouped by namespace), and the detail pane on the right shows every locale's value for the active key. If only app_en.arb exists, you'll see one locale row in the detail pane.
Step 2: Add your locales#
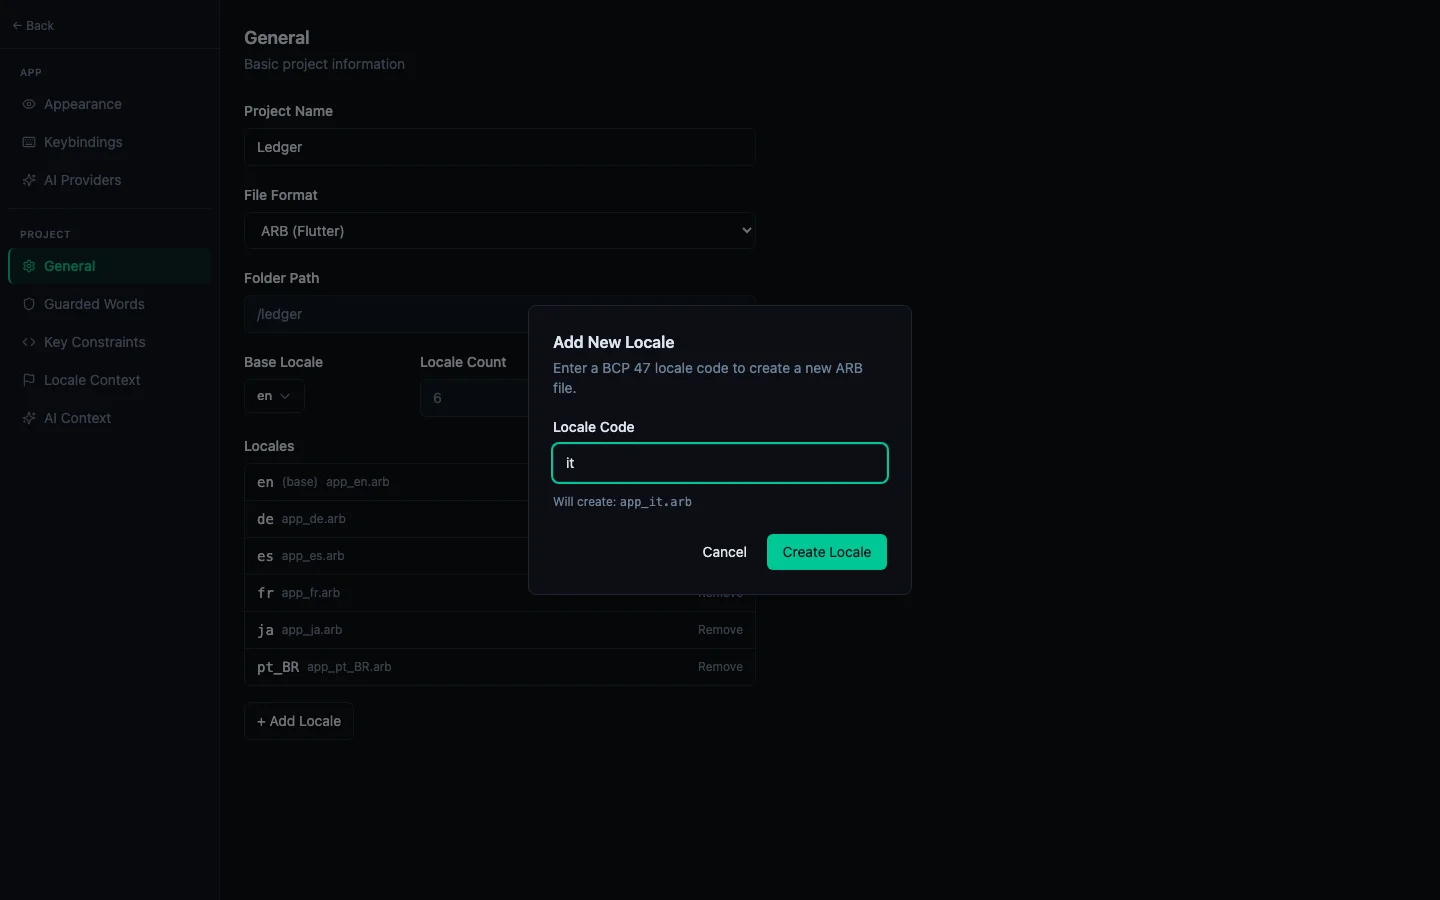
Open Settings → Project → General (⌘,) and click + Add Locale below the locale list.
Enter the locale's BCP 47 code — es — and click Create Locale. There is no language-name search: you type the code, and StringLane previews the file it will create (Will create: app_es.arb) before you commit. It creates lib/l10n/app_es.arb as an empty locale file, and every cell for Spanish shows the red Missing badge.
StringLane then offers to translate the new locale immediately. Take Later for now — the context you add in Step 3 makes a large difference to the result.
Repeat for any other languages you need:
fr: Frenchde: Germanja: Japanesept-BR: Brazilian Portuguesezh-Hans: Chinese (Simplified)
Step 3: Configure AI translation context#
Before bulk-translating, add product context so the AI understands your app:
- Open Settings (⌘,)
- Under App → AI Providers, select a provider and enter your API key if you haven't already
- Under Project → AI Context, write 2-3 sentences in Product Context: what the app does, who uses it, what tone to use
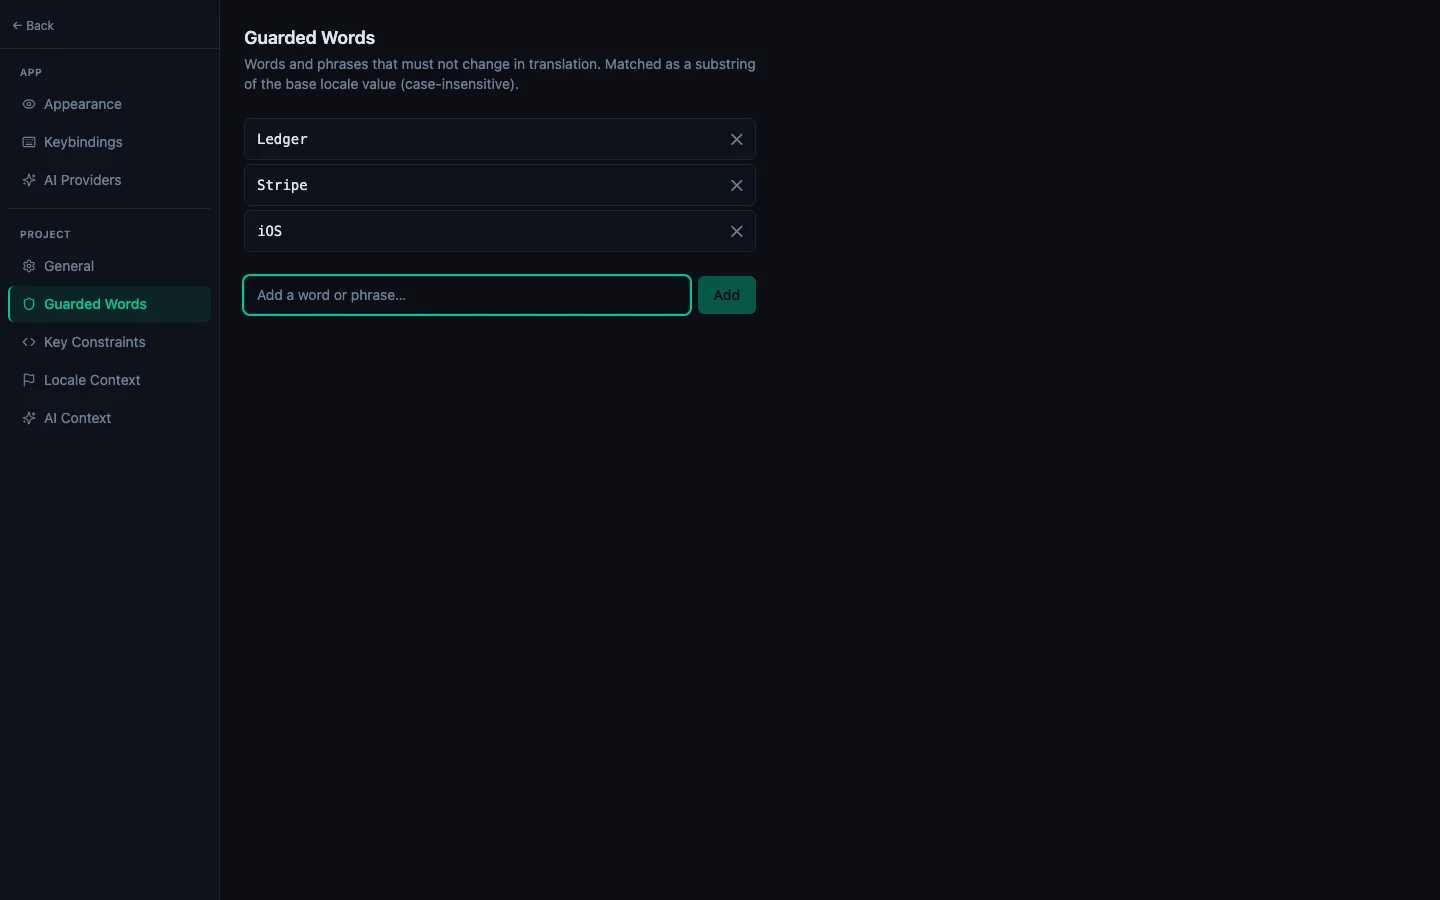
- Under Project → Guarded Words, add your app name, brand terms, and any technical term that must not be translated
Provider and key are App settings — set once, used by every project. Context and guarded words are Project settings, stored with this app.
Step 4: Bulk translate each locale#
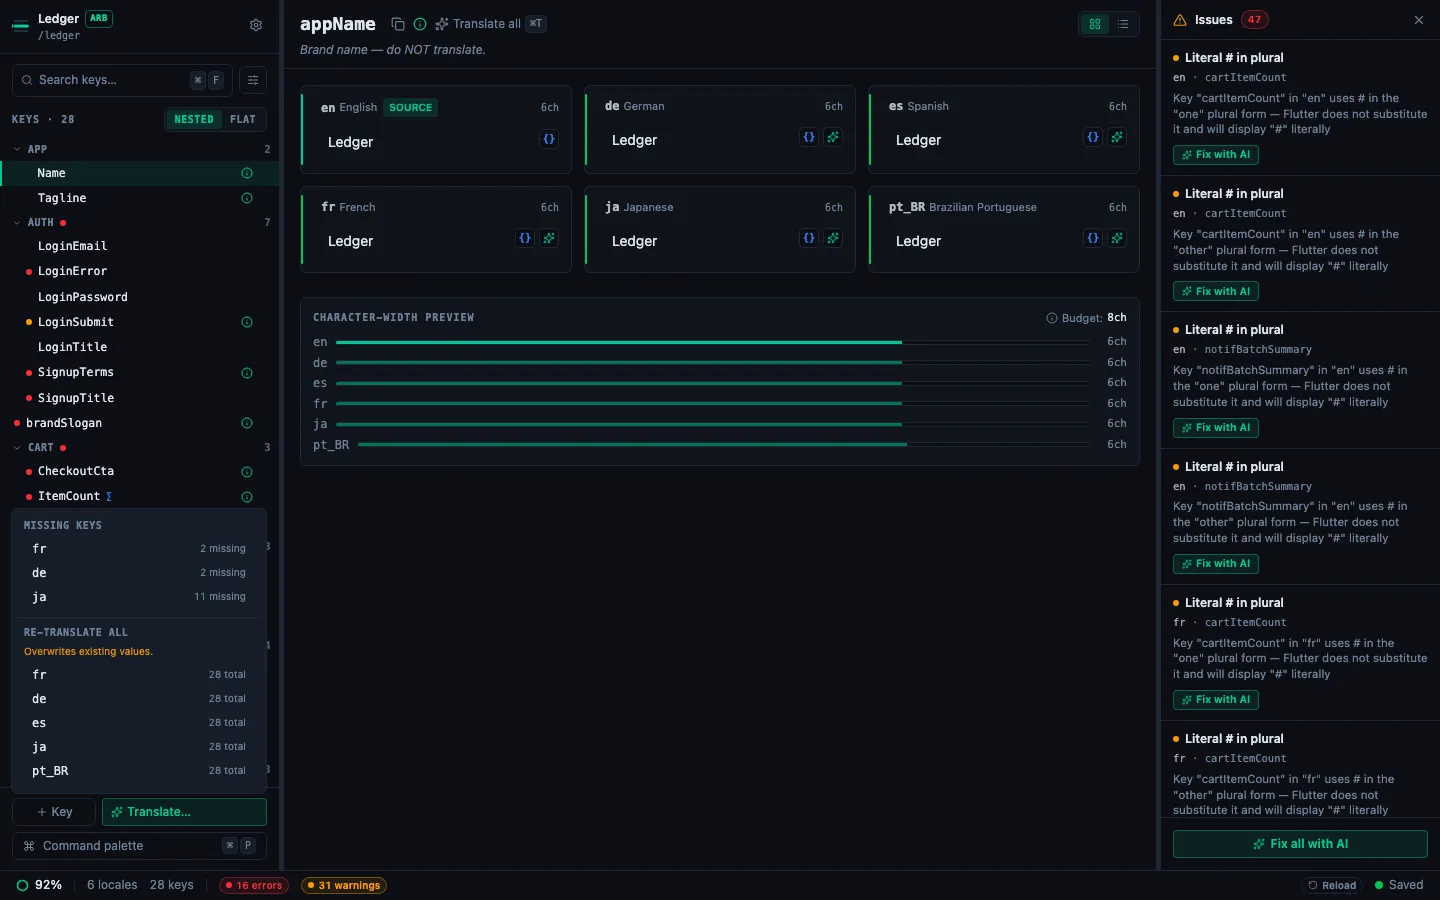
Click ✨ Translate… in the sidebar footer. Under Missing keys, each locale is listed with its outstanding count — es · 47 missing. Click Spanish, and a dialog confirms the count before anything runs.
StringLane translates in batches. For a typical app with 50-200 keys, this takes 30-90 seconds. You can cancel mid-run without losing progress: completed translations are already saved.
Repeat for each additional locale.
Step 5: Review and fix validation errors#
After bulk translation, open the Issues Panel (⌘J) to see every remaining problem in one list:
- Missing (red): key was not translated: can happen if the API call failed. Click ✨ on the row to retry individually.
- Param (red): a placeholder like
{userName}is in the English source but missing from the translation. Click Fix param on the row to restore it. - ICU (red): the model produced malformed ICU syntax. Click Fix with AI on the row to repair the structure while preserving your text.
- Same (yellow): the translation is identical to English: often correct for proper nouns, but worth checking.
The footer Fix all with AI sweeps every AI-addressable row in one pass.
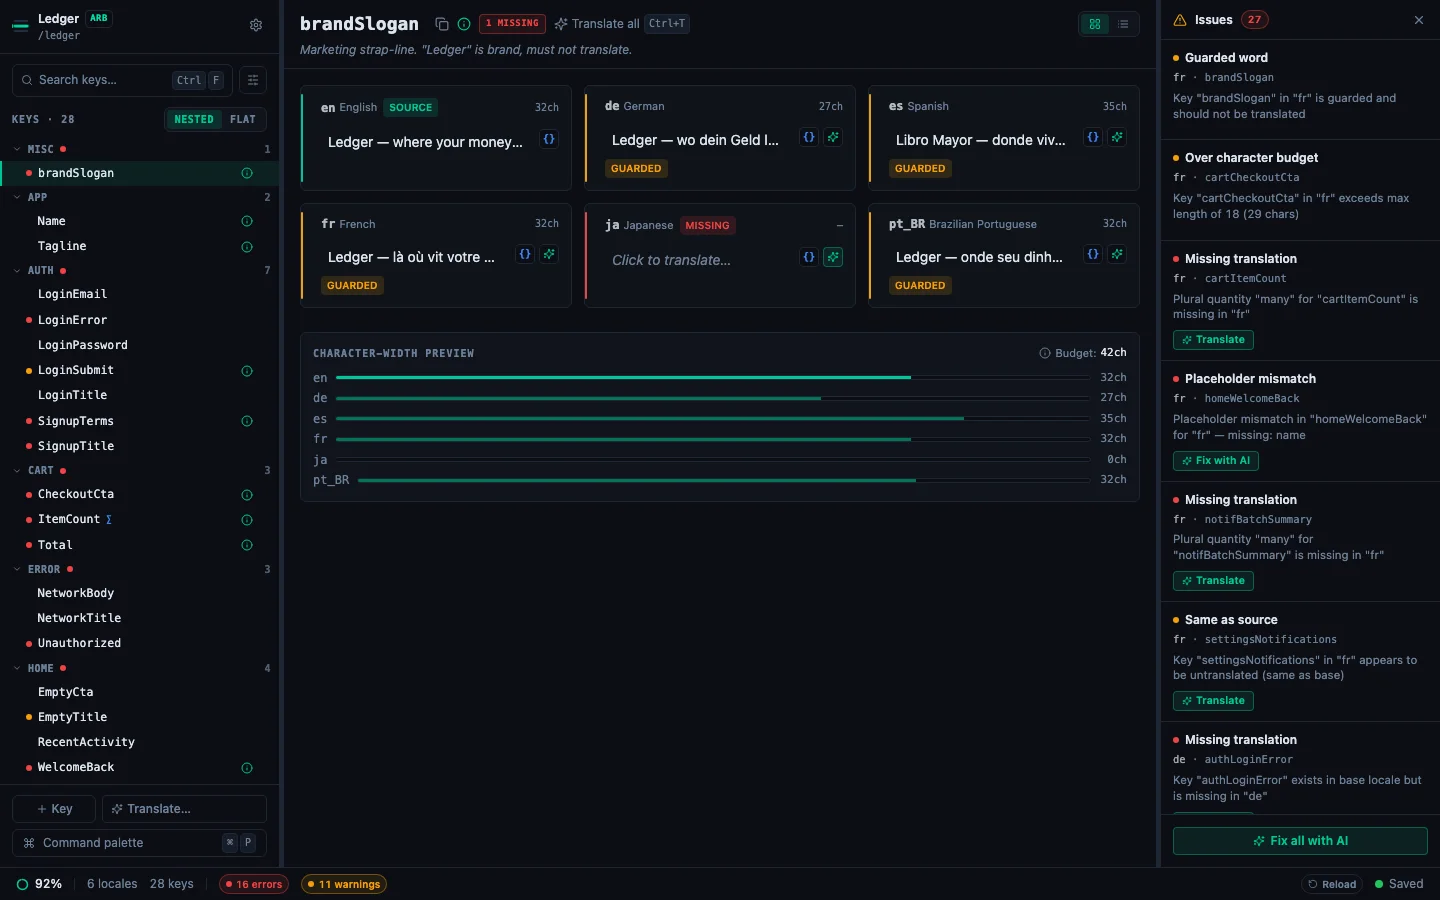
For a fresh app with standard strings, expect mostly clean results with a few Param badges on strings with variables.
Step 6: Save and regenerate#
StringLane auto-saves every edit. Your lib/l10n/app_es.arb (and other locale files) are already updated on disk.
Now regenerate the Dart stubs. You have three options.
From StringLane. When an ARB project has an l10n.yaml at its root, StringLane puts a gen l10n button in the status bar. Click it and the generator runs in your project root, showing running… then done — or error, with the failure message on hover. The same command is in the Command Palette (⌘P) as Run flutter gen-l10n.
It finds the Flutter binary by asking your login shell where it lives, so FVM, asdf, snap and non-standard install paths work without configuring anything. If it still can't find it, the error tooltip names the shell and PATH it tried rather than just saying "not found".
From a terminal:
flutter gen-l10nAutomatically, if you have generate: true under flutter: in pubspec.yaml: it runs on flutter run and flutter build.
If the generator stops with an error, Flutter gen-l10n errors quotes each message with its cause and fix.
Step 7: Test in the app#
Run your app with a specific locale to verify:
# Flutter run with a specific device locale
flutter run --dart-define=flutter.locale=es
Or change the device locale in Settings and re-launch the app.
If you see any strings falling back to English in the running app, check lib/l10n/app_es.arb: the key might have a typo or the file might have a JSON syntax error (StringLane prevents this, but worth checking).
Updating translations over time#
When you add new keys to app_en.arb:
- Open the project in StringLane: new keys show Missing in all target locales
- Bulk translate as before
- Run
flutter gen-l10n
StringLane only touches keys you've edited, existing translations for unchanged keys are untouched.
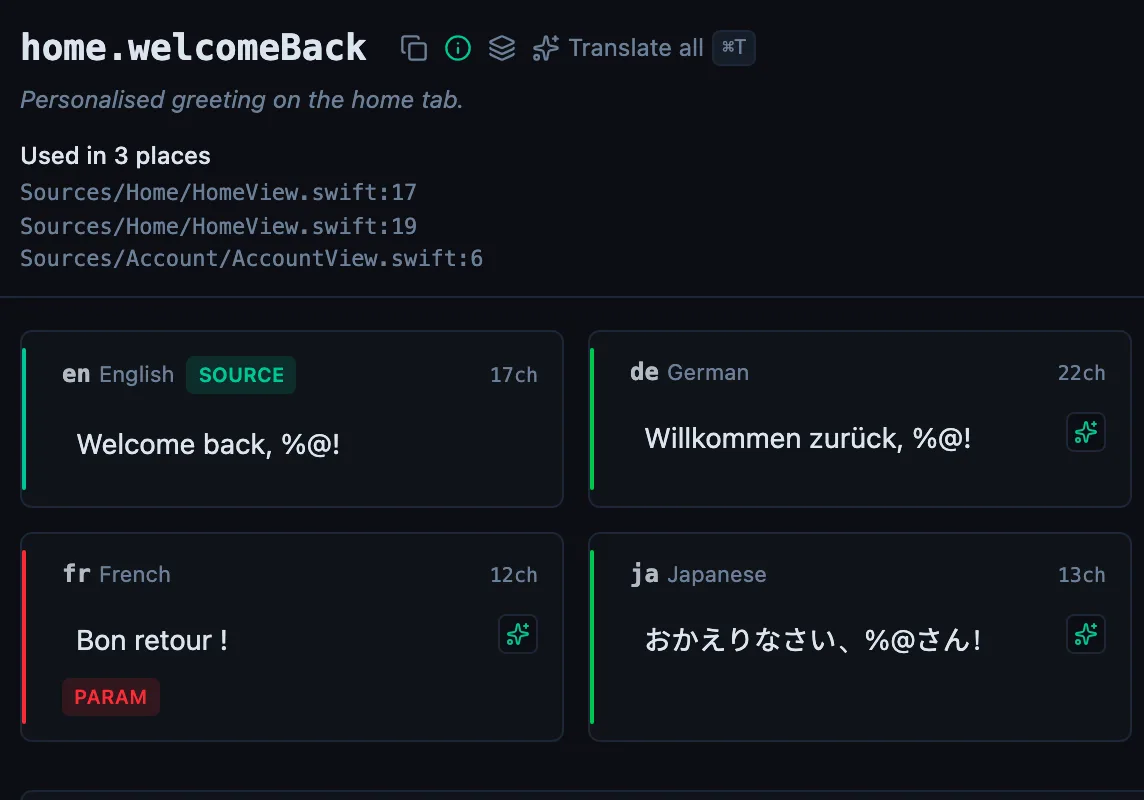
See every locale side by side
The desktop app flags what is missing or broken on the cell, and saves to your files.
14-day trial, no email