How to Add a New Locale
Create a new locale in StringLane by entering its BCP 47 code. What file gets created, and what happens on multi-package projects.
Last updated
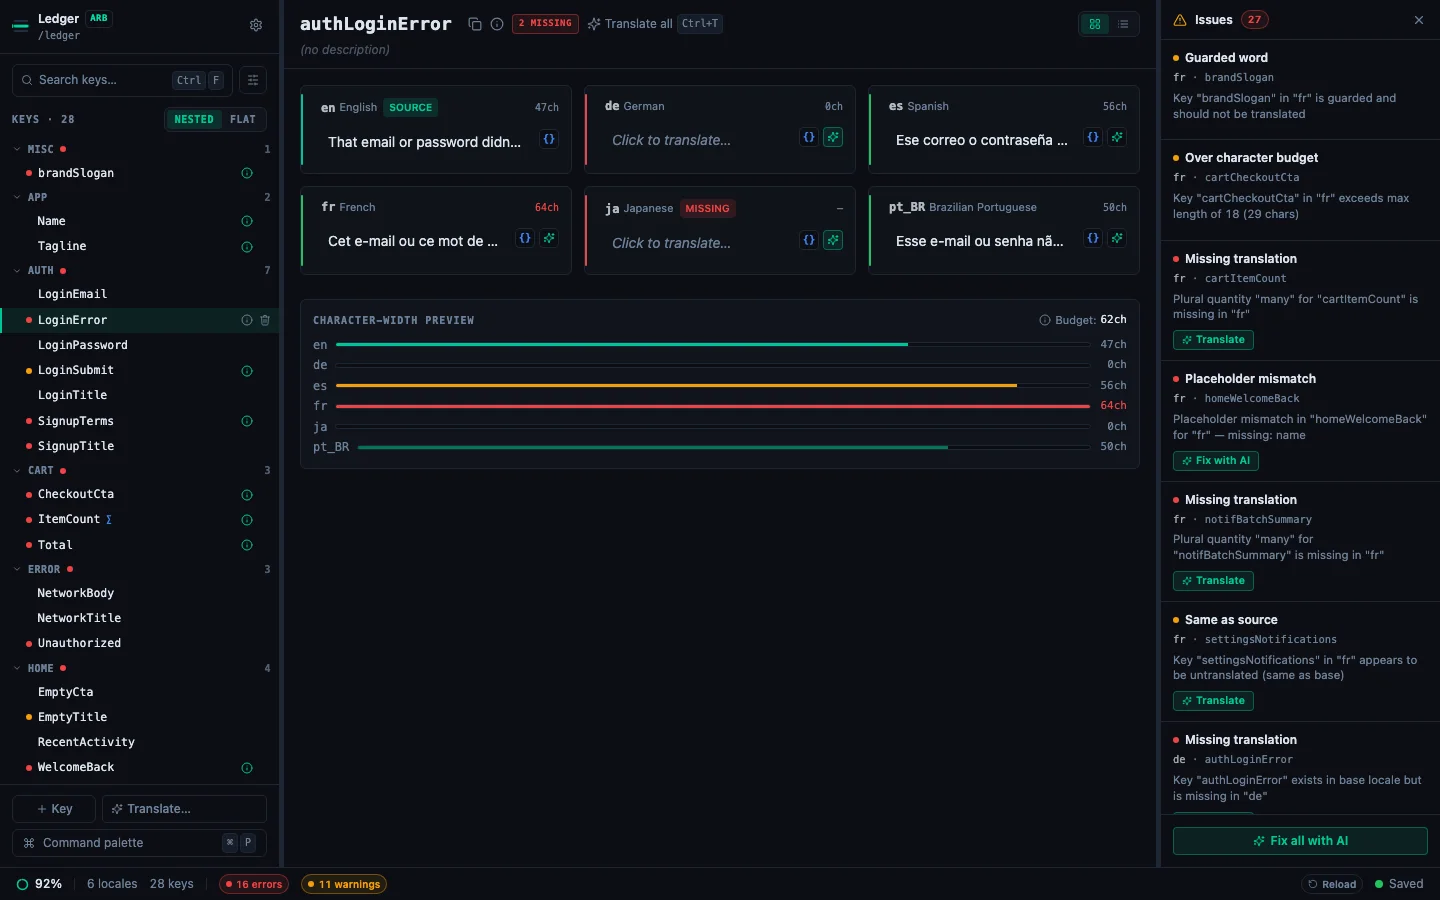
Adding a locale creates a new localization file in your project folder. The new locale then appears alongside every other one in the detail pane, and in the Issues panel.
Steps#
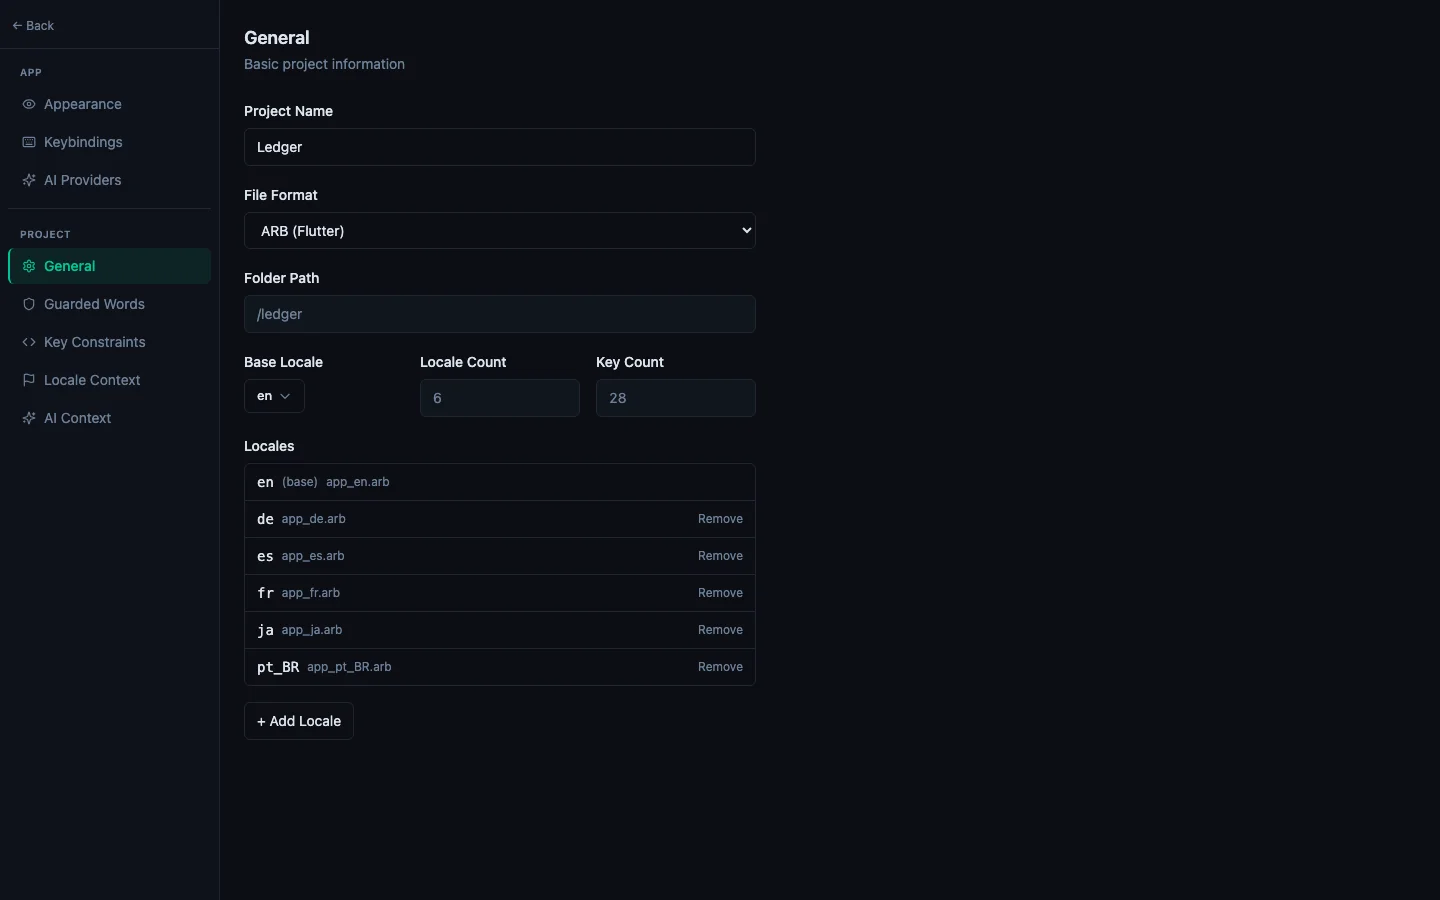
- With a project open, click + Add Locale in Settings → Project → General, below the locale list.
-
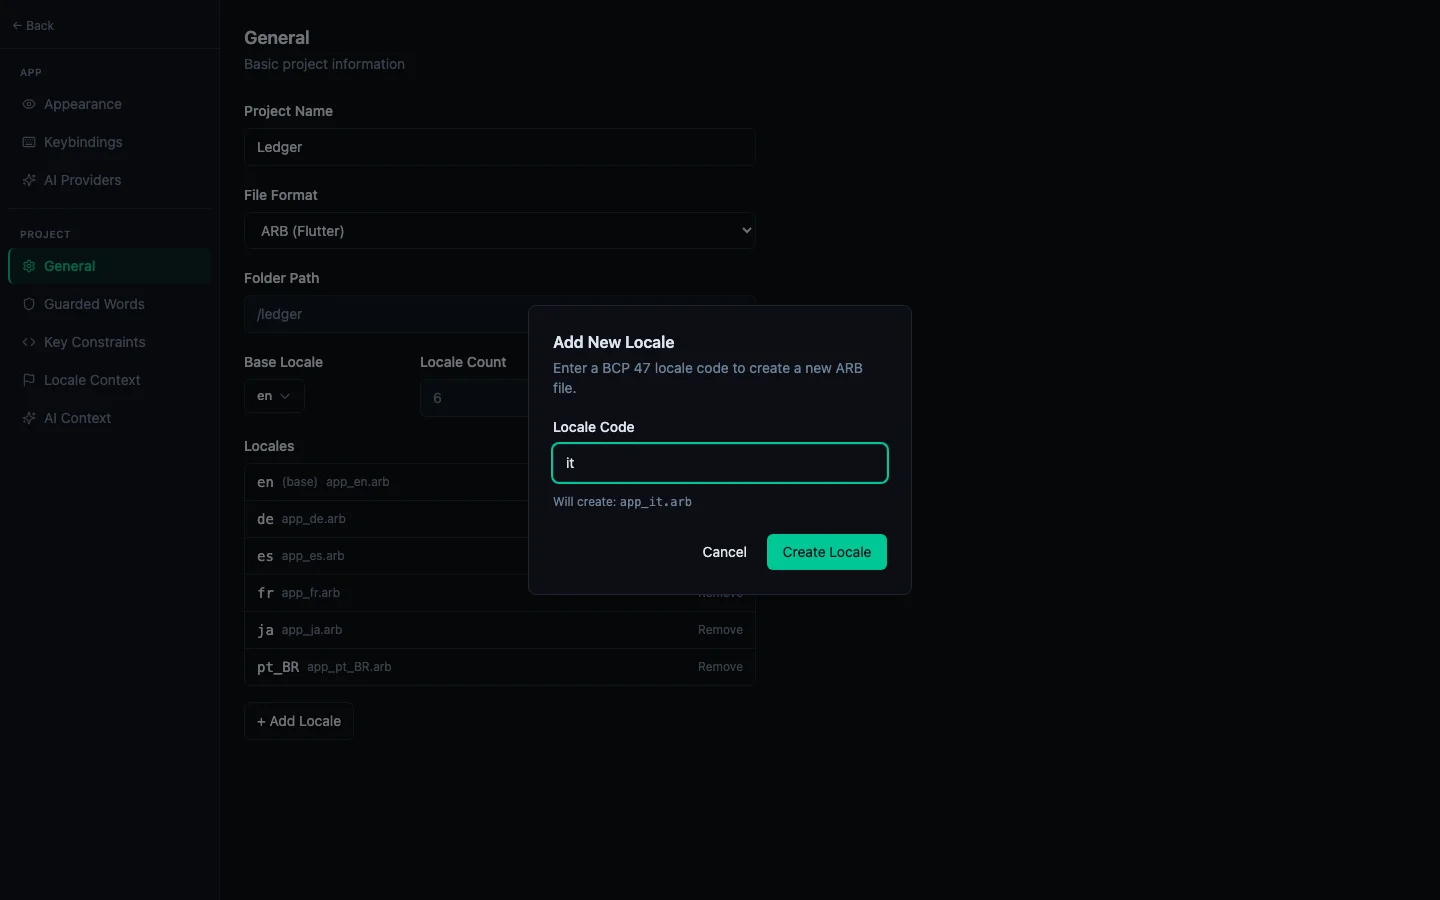
The Add New Locale dialog asks for one thing: a Locale Code in BCP 47 form:
de,fr-CA,zh-Hans,pt-BR. -
As you type, StringLane shows the file it is about to create (
Will create: app_it.arb). It rejects codes that are malformed or already in the project, and Create Locale stays disabled until the code is valid.
There is no language picker. You type the code, not a language name. "French" will not resolve to
fr. If you are unsure of a code, the IANA subtag registry is the authority; the short answer is usually the two-letter ISO 639-1 code, optionally plus a region (pt-BR) or script (zh-Hans).
Multi-package projects#
If your project spans several packages or namespaces (a multi-module Android app, or an i18next setup with separate namespace folders), the dialog also shows a Packages list with a checkbox per origin, and a filename preview for each.
Tick the ones that should get the new locale. StringLane remembers your selection and pre-ticks the same set next time. See How to Open a Localization Project for how multi-origin projects are detected.
Translate it straight away#
The moment the file is created, StringLane offers a Translate New Locale prompt: "Would you like to AI-translate all keys into it now?" Keys marked not for translation, and strings Xcode marks Stale, are left out of it. A new Android regional override (below) gets no prompt, because it owes no strings.
- Translate Now starts a bulk translation into the new locale immediately. It is disabled until an AI provider is configured. See Set Up AI Translation.
- Later dismisses it. You can always run the same thing afterwards from the ✨ Translate… popover in the sidebar footer.
What gets created#
StringLane creates a new localization file in your project using the same format and naming convention as your existing files:
- ARB:
app_fr.arbalongside your existingapp_en.arb - iOS .strings:
fr.lproj/Localizable.strings - Android XML:
res/values-fr/strings.xml. A region or script gets the folder name Android reads:fr-CAcreatesvalues-fr-rCA/, andzh-Hantcreatesvalues-b+zh+Hant/. Android does not readvalues-fr-CA/as French (Canada), so StringLane never writes that name. - i18next JSON:
fr/translation.json
The new file is empty, so every key shows the red Missing badge for that locale. In a String Catalog, StringLane adds entries only for the strings the language needs, not for strings Xcode marks Stale or strings marked not for translation.
Android regional overrides start empty#
On Android, a regional locale such as fr-CA can override a language the project already has, here values-fr/. Android shows the parent language's string for every string the override does not define, so StringLane creates the override folder with no strings in it rather than an empty string per key, which Android would show as blank text. Its cells show the parent's text in italics until you type an override, and none of them is counted as missing. Add only the strings that differ. See How to Use the List View.
The parent must match in language and writing script. zh-Hant-TW does not use values-zh/ as its parent, and de-AT has none when the project has no values-de/. Those get every key, empty, ready to translate.
After adding a locale#
From here you can:
- Bulk translate with AI: click ✨ Translate… in the sidebar footer and pick the new locale under Missing keys. See How to Bulk-Translate a Locale.
- Give the AI regional guidance: 50 locales ship with built-in cultural context that is applied automatically. See How to Use Locale Presets.
- Translate manually: click each cell and type your translation.
- Check coverage: use the Missing filter in the search bar to see only untranslated keys.
See every locale side by side
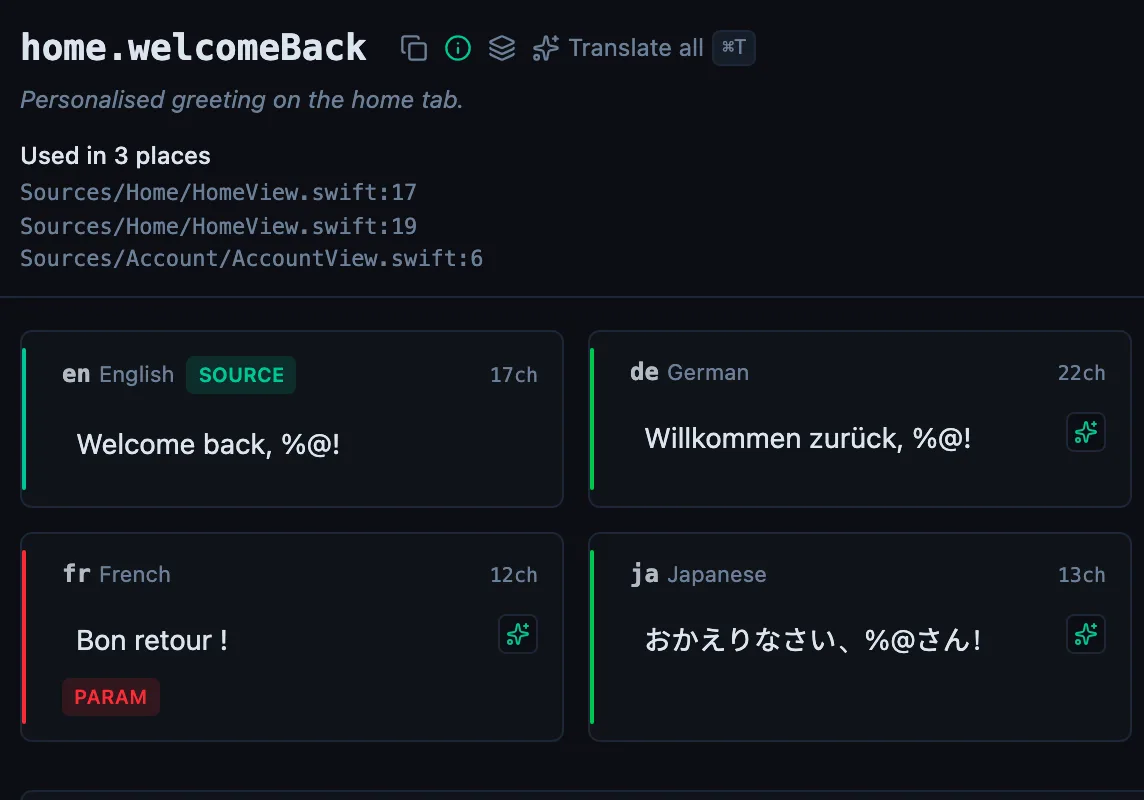
The desktop app flags what is missing or broken on the cell, and saves to your files.
14-day trial, no email